Have you seen those mesmerizing videos of jelly desserts with whole fruits suspended inside? They look like edible art! I was captivated and on a mission to recreate that magic at home. The result is this incredibly simple and stunning Milk and Fruit Dessert. It’s a light, refreshing treat that’s as fun to make as it is to eat, transforming simple ingredients into something truly special.

This recipe solves the search for a healthy-ish dessert that will wow your family and friends. Using a simple agar-agar technique, we’ll create a firm milk jelly that slices beautifully to reveal the colorful fruit hidden within. It’s the perfect light dessert after dinner or a fun, healthy snack for kids.
Key Ingredients for Success
The magic of this dessert comes from a few very specific ingredients.
- Agar Agar Powder: This is the non-negotiable star of the recipe. Agar agar is a plant-based gelling agent derived from seaweed. Unlike gelatin, it sets firmly at room temperature and must be activated by boiling. This process is what allows us to create a sturdy jelly that can be unmolded and sliced perfectly.
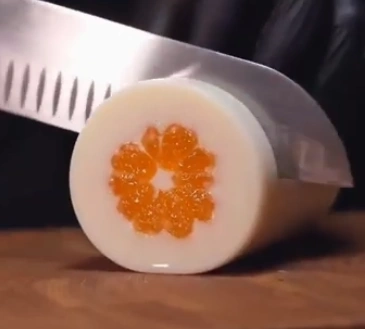
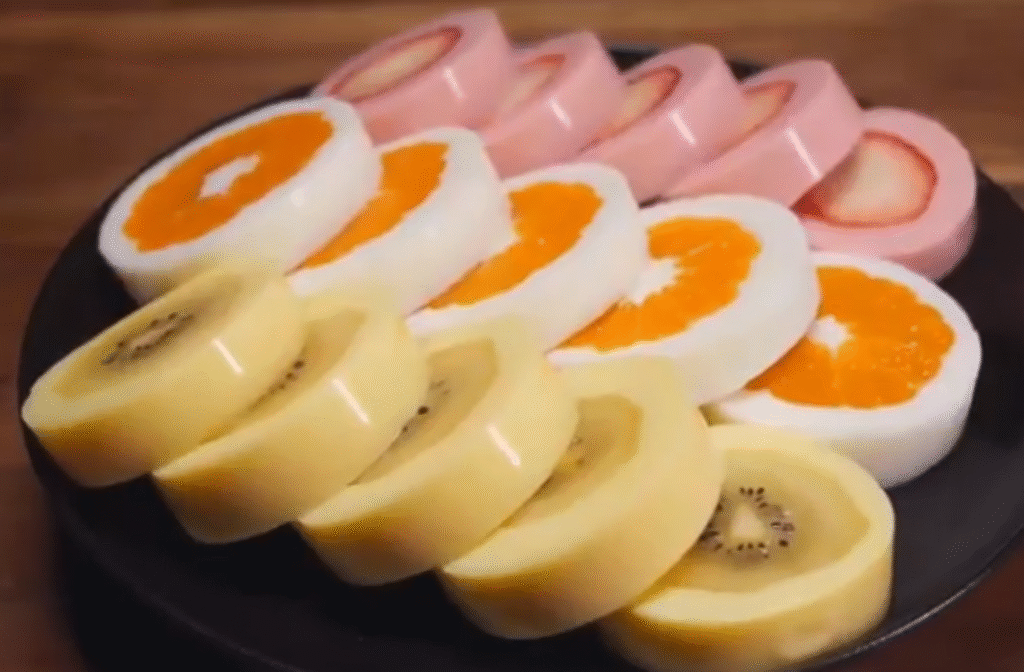
- Whole Fruits (Tangerines, Kiwis, Strawberries): The visual “wow” factor comes from using whole, peeled fruits stacked inside the glass. When you slice the final dessert, you reveal a beautiful, mosaic-like cross-section. Using ripe, sweet fruit is key, as their flavor is the perfect contrast to the creamy milk jelly.
- Milk (Plain or Flavored): A standard whole milk creates a classic, creamy white base that makes the fruit colors pop. But you can also have fun with it! Using a pre-flavored milk like strawberry or banana adds another layer of flavor and color to the dessert, but remember to reduce the sugar accordingly.
Helpful Tools and Equipment
- Straight, cylindrical drinking glasses
- Small saucepan
- Spatula or whisk
- Heat-safe measuring cup with a spout
Pro-Tips for Perfect Results
- Pick the Perfect Glass: The key to a beautiful shape is a straight-sided glass that is the same width from top to bottom. It should be just slightly wider than your fruit, leaving a small gap for the milk mixture to fill.
- Activate the Agar Properly: Don’t skip the final simmer! After the milk mixture comes to a boil, you must continue to stir it over low heat for one full minute. This step is crucial for fully activating the gelling power of the agar agar, ensuring your dessert sets firmly.
- Stir, Stir, Stir: When heating the milk, sugar, and agar, stir constantly with a spatula, scraping the bottom of the pot. This prevents the milk from scorching and ensures the agar powder dissolves completely without clumps.
- Unmold with Confidence: To release the jelly, run the very tip of a thin knife around the top edge to break the seal. Then, turn the glass upside down over a plate and give it a few gentle side-to-side shakes. It should slide right out!
How to Make Milk and Fruit Dessert
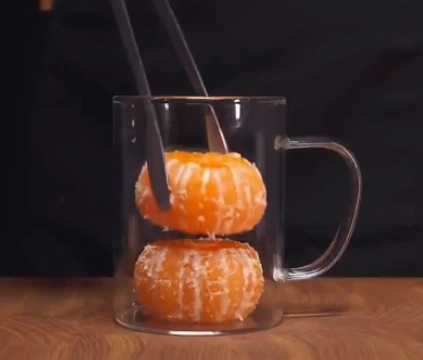
- Prepare the Fruit and Molds: First, choose your fruit. Peel the tangerines or kiwis, or remove the greens from the strawberries. Trim the top and bottom of each fruit so they can be stacked neatly and sit flat. Carefully stack the prepared fruit inside your straight-sided cylindrical glasses.
- Cook the Milk Jelly: In a saucepan, combine your milk (plain or flavored), sugar (use less for pre-sweetened milk), and the agar agar powder. Place the pot over medium-low heat.
- Heat and Activate: Stir the mixture constantly as it heats up. Bring it to a gentle boil. Once you see bubbles, reduce the heat to low and set a timer for 1 minute. Continue stirring for this full minute to activate the agar.
- Cool and Pour: Immediately remove the pot from the heat and pour the hot liquid into a measuring cup to make pouring easier. Let it cool for just 1-2 minutes—any longer and it will start to set.
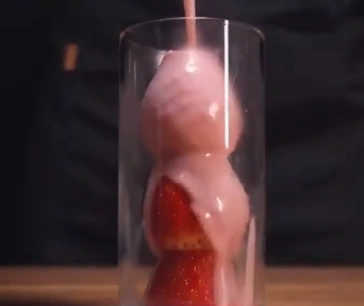
- Assemble the Dessert: Carefully pour the milk mixture into the glasses, over the stacked fruit. Make sure the liquid fills all the gaps around the fruit and covers it completely.
- Chill Until Firm: Place the glasses in the refrigerator and chill for at least 1 hour, or until the jelly is completely firm to the touch.
- Unmold and Serve: To serve, run a knife around the top edge and gently shake the jelly out onto a cutting board or plate. Slice the cylinder into thick, beautiful rounds and enjoy immediately!

Variations to Try
- Chocolate Milk Version: Use chocolate milk (and reduce the sugar) for a decadent treat. This would be amazing with stacked banana slices.
- Rainbow Fruit: Use a taller glass and create a rainbow stack with different fruits like kiwi, tangerine, and strawberry all in one.
- Coco[5]nut Cream: For a dairy-free, tropical twist, substitute the milk with a can of full-fat coconut milk and use chunks of fresh mango as the fruit.
Easy & Beautiful Milk and Fruit Dessert (Viral Recipe!)
A simple, beautiful, and healthy dessert! This recipe shows you how to make the viral milk jelly dessert with whole fruit suspended inside. It’s easy to make, fun to serve, and absolutely delicious.
- Total Time: 1 hour 15 minutes
- Yield: 2
Ingredients
The Fruits (Choose One)
3 small tangerines, peeled
4-5 strawberries, greens removed
2 kiwis, peeled
The Milk Mixture
300ml milk (whole milk, or flavored milk like strawberry/banana)
60g granulated sugar (use 30g if using pre-sweetened flavored milk)
6g Agar Agar Powder
Instructions
1. Prepare the Fruit and Molds: Peel your chosen fruit and trim the ends so they sit flat. Carefully stack the fruit inside a straight, cylindrical glass.
2. Cook the Milk Jelly: In a saucepan, combine the milk, sugar, and agar agar powder.
3. Heat and Activate: Place the pot over medium-low heat and stir constantly until it comes to a gentle boil. Reduce heat to low and continue stirring for exactly 1 more minute to fully activate the agar.
4. Cool and Pour: Remove from heat and let the mixture cool for 1-2 minutes. Carefully pour it into the glass over the stacked fruit, ensuring it fills all the gaps.
5. Chill Until Firm: Place the glass in the refrigerator for at least 1 hour, or until the jelly is completely firm.
6. Unmold and Serve: Run a thin knife around the top edge of the jelly to break the seal. Turn the glass upside down and gently shake until the jelly slides out. Slice into thick rounds and enjoy!
Notes
Use Agar Agar: You must use Agar Agar powder for this recipe, not gelatin, as the boiling method is specific to activating agar.
Glass Choice is Key: Use a straight cylindrical glass that is the same width at the top and bottom for easy unmolding and a uniform shape.
Don’t Stop Stirring: Stir the milk mixture constantly while heating to prevent burning and ensure the agar dissolves smoothly.
Flavored Milk: If you use a pre-sweetened flavored milk (like strawberry or banana milk), reduce the added sugar to 30g.
- Prep Time: 10
- Cook Time: 5
- Category: Dessert
- Method: No-Bake
- Cuisine: International
- Diet: Vegetarian
Frequently Asked Questions
Can I use gelatin instead of agar agar powder?
For this specific recipe, agar agar is essential. Gelatin does not set as firmly at room temperature and requires a different preparation method (blooming in cold water, not boiling). The boiling technique used here is designed specifically to activate agar agar for a sturdy, sliceable result.
Why didn’t my milk and fruit dessert set properly?
The most common reason for a soft or watery dessert is that the agar agar was not activated correctly. It’s critical to bring the milk mixture to a boil and then let it simmer while stirring for one full minute. If this step is skipped, the jelly will not reach its full gelling potential.
How long does this dessert last in the fridge?
This dessert is best enjoyed within 1-2 days. You can store the unmolded jelly in an airtight container in the refrigerator. After a couple of days, the fruit may start to release water, which can make the jelly slightly softer.
A Dessert That’s Almost Too Pretty to Eat!
Ready to impress everyone with this simple yet elegant Milk and Fruit Dessert? It’s a joy to create and even more fun to serve. If you try it, let me know which fruit combination is your favorite in the comments below!