
Table of Contents
There’s something magical about the first bite of a Japanese Tamago Sando. The pillowy soft bread gives way to a cloud-like egg salad that’s rich, creamy, and perfectly seasoned. Unlike American egg salad sandwiches, this Japanese version uses a silkier texture and a touch of sweetness that makes it utterly addictive. Whether you’re looking for a quick lunch, a picnic treat, or just want to experience one of Japan’s most beloved convenience store offerings at home, this recipe delivers authentic flavor with simple ingredients.
Key Ingredients
The beauty of Japanese Tamago Sando lies in its simplicity. Each ingredient plays a crucial role in creating that signature silky texture and balanced flavor. The eggs need to be perfectly cooked – not too firm, not too soft. Japanese mayonnaise (Kewpie) adds a distinctive umami richness that regular mayo can’t quite replicate. The slight sweetness from sugar and the gentle seasoning create a harmony that makes this sandwich truly special. Even the bread matters – soft, slightly sweet milk bread or brioche creates the perfect vehicle for the creamy egg filling.

Ingredients List
| Ingredient | Quantity |
|---|---|
| mini brioche buns (or white bread slices) | 6 buns OR 12 slices |
| large eggs | 6 |
| Japanese mayo (or regular mayo) | ⅓ cup |
| salt | ¼ teaspoon |
| white granulated sugar | ½ teaspoon |
| black pepper | ⅛ teaspoon |
| dried parsley (optional) | 1 teaspoon |
| white vinegar (optional, for boiling) | 1 tablespoon |
| salt (for boiling water) | ½ teaspoon |
Helpful Tools
Creating the perfect Japanese Tamago Sando requires just a few essential tools that make the process much smoother. A medium pot with a lid is crucial for even egg cooking. A slotted spoon helps transfer hot eggs safely to the ice bath. The ice bath itself is non-negotiable – it stops the cooking process and makes peeling infinitely easier. A fine-mesh sieve transforms egg yolks into that signature silky texture. A sharp knife ensures clean cuts through the delicate egg whites. Finally, a good mixing bowl and spatula complete your toolkit for this simple yet precise recipe.
Pro-Tips for Perfect Japanese Tamago Sando
Success with this recipe comes down to a few key techniques. First, always use room temperature eggs – they cook more evenly and are less likely to crack. Second, the ice bath isn’t optional; it’s what gives you that perfect texture. Third, when peeling, start from the wider end where there’s an air pocket – this makes the process much cleaner. Fourth, don’t skip the fine-mesh sieve for the yolks; this step creates that signature silky texture that defines Japanese Tamago Sando. Fifth, if you want to elevate your breakfast game even further, try pairing this with our Yogurt Sandwich Recipe Best Breakfast Bread – the combination makes for an incredible brunch spread.
How to Make Japanese Tamago Sando
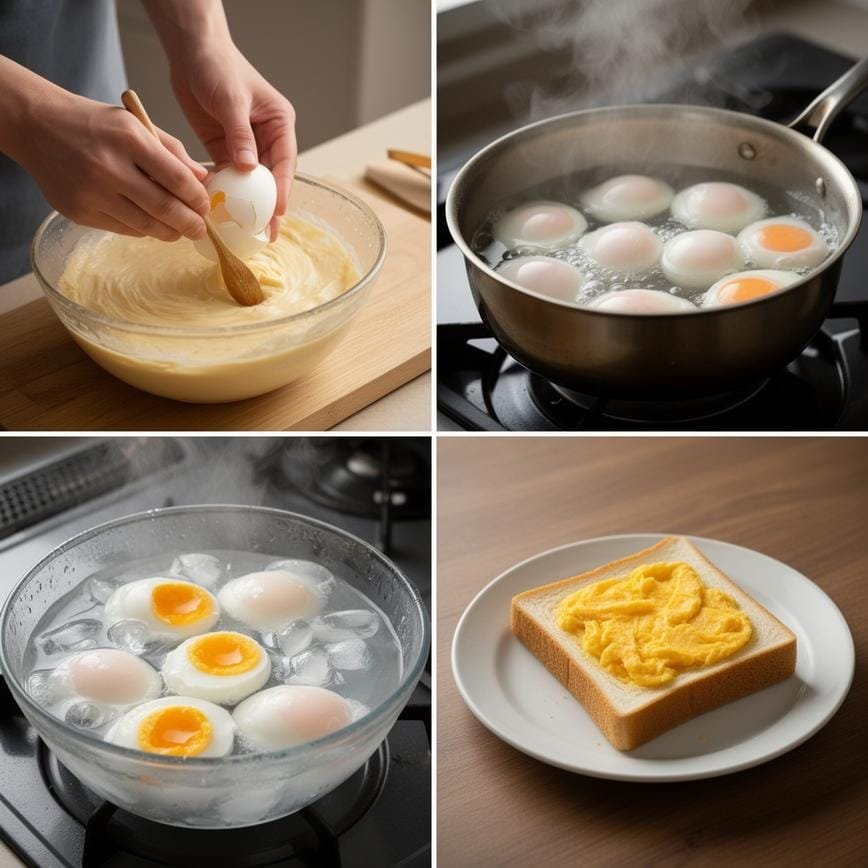
Making Japanese Tamago Sando is straightforward when you follow these steps carefully. The key is patience and attention to detail, especially when handling the eggs.
- Fill a medium pot with enough water to cover eggs and bring to a rolling boil over high heat. Add the optional vinegar and salt to the water.
- Carefully lower room temperature eggs into the boiling water using a slotted spoon. Reduce heat to medium-high and boil covered for exactly 13 minutes.
- While eggs cook, prepare an ice bath in a large bowl with cold water and plenty of ice cubes.
- Once eggs are done, immediately transfer them to the ice bath using the slotted spoon. Let them cool completely, about 5-7 minutes.
- Tap the wider end of each egg on a hard surface and use the back of a spoon to insert between the shell and egg white, then peel completely.
- Separate egg whites from yolks by running a sharp knife around each yolk. Transfer whites to a separate bowl.
- Press egg yolks through a fine-mesh sieve into a large mixing bowl, using a spatula to push them through completely.
- Dice egg whites finely with a knife and add to the bowl with sieved yolks.
- Add salt, pepper, sugar, and Japanese mayo to the egg mixture. Mix gently with a spatula until creamy but still slightly textured.
- Slice brioche buns 95% of the way through or prepare your bread slices.
- Spoon equal portions of egg salad onto each bun or bread slice, then close the sandwich.
- Garnish with dried parsley if desired. Serve immediately or refrigerate up to 2 hours before serving.
Variations to Try
Once you’ve mastered the classic Japanese Tamago Sando, there are several delicious variations to explore. For a protein boost, add finely chopped cooked shrimp or crab meat to the egg mixture. You can also incorporate Japanese-inspired flavors like a touch of wasabi paste or a sprinkle of furikake seasoning. For a vegetarian twist, mix in some finely diced cucumber or avocado for added freshness and texture. Some people enjoy adding a thin layer of butter to the bread before adding the egg salad for extra richness. You could even experiment with different breads – try it on toasted milk bread or even in a croissant for a fusion breakfast treat.
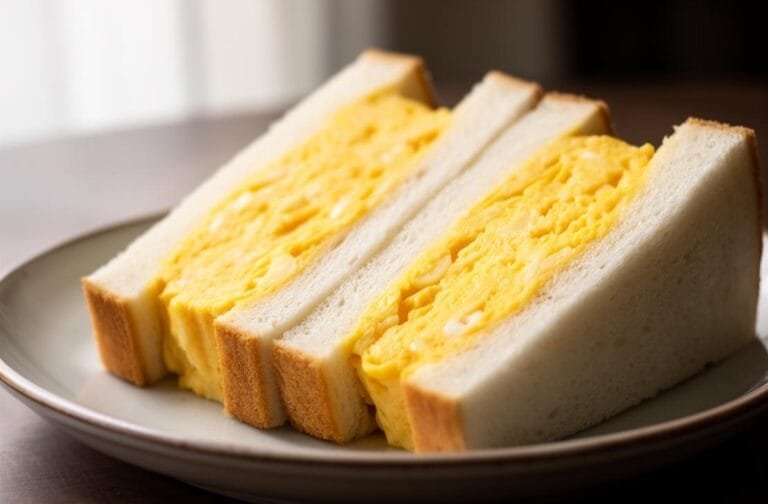
Japanese Tamago Sando: Best Creamy Egg Salad Sandwich
A rich, creamy, and pillowy soft Japanese Egg Sandwich (Tamago Sando). Made with perfectly boiled eggs, tangy Kewpie mayonnaise, and thick slices of soft Japanese milk bread (Shokupan), this cafe-style sandwich is the ultimate comfort food. It’s incredibly simple to make and is truly the best egg salad you will ever taste!
- Total Time: 25
- Yield: 2 sandwiches
Ingredients
— The Sandwiches —
4 slices Shokupan (Japanese milk bread) or thick-cut soft white bread
4 large eggs (at room temperature)
1 tablespoon softened butter (for spreading)
— Creamy Egg Salad Dressing —
3 tablespoons Kewpie mayonnaise (crucial for authentic flavor)
1/2 teaspoon granulated sugar
1/2 teaspoon Dijon mustard (or Japanese Karashi mustard for a kick)
1 tablespoon whole milk or heavy cream (optional, for extra creaminess)
1/4 teaspoon fine sea salt (or to taste)
1/8 teaspoon freshly ground black pepper
Instructions
1. **Boil the Eggs:** Bring a medium pot of water to a gentle boil over medium-high heat. Carefully lower the eggs into the water. For the perfect texture, boil for 8-9 minutes (for firm but creamy yolks). Immediately transfer the eggs to an ice water bath for 5 minutes to stop the cooking.
2. **Peel and Mash:** Peel the cooled eggs and place them in a medium mixing bowl. Use a fork (or a potato masher) to mash the eggs until they are broken down into small, even pieces. *Pro Tip: For a cafe-style presentation, you can boil one extra egg for just 6.5 minutes, cut it in half, and place it in the center of the sandwich before adding the egg salad!*
3. **Mix the Egg Salad:** To the mashed eggs, add the Kewpie mayonnaise, sugar, mustard, milk (if using), salt, and pepper. Mix thoroughly until the egg salad is completely smooth, rich, and creamy.
4. **Prepare the Bread:** Spread a very thin, even layer of softened butter onto one side of each slice of bread. This acts as a moisture barrier to prevent the bread from getting soggy.
5. **Assemble the Sando:** Divide the creamy egg salad in half. Spoon a generous mound onto the buttered side of two slices of bread, spreading it gently to the edges. Top with the remaining slices of bread, butter-side down.
6. **Press and Trim:** Place a small, lightweight cutting board or plate on top of the sandwiches for 3-5 minutes to help them hold their shape. Using a very sharp knife (wiped clean with a damp cloth between cuts), trim the crusts off all four sides. Cut the sandwich in half down the middle and serve immediately!
Notes
Kewpie Mayonnaise: Do not skip this! Japanese Kewpie mayo is made with only egg yolks and a unique blend of vinegars, giving it a richer, sweeter, and tangier flavor profile than American mayonnaise.
Bread Choices: Shokupan is famous for its fluffy, cloud-like texture. If you can’t find it at a local Asian bakery, use the softest, thickest white bread you can find, like Brioche or Texas Toast.
Make Ahead: You can prepare the egg salad up to 2 days in advance and store it in an airtight container in the refrigerator. Assemble the sandwiches right before you are ready to eat to keep the bread perfectly soft.
Butter Substitute: If you don’t have softened butter for the bread barrier, a very thin layer of extra Kewpie mayo works as well.
- Prep Time: 15
- Cook Time: 10
- Category: Sandwich / Lunch
- Method: Boiling
- Cuisine: Japanese
- Diet: Vegetarian
FAQ
What makes Japanese Tamago Sando different from regular egg salad sandwiches?
Japanese Tamago Sando uses Japanese mayonnaise (Kewpie) which has a richer, more umami flavor than regular mayo. The eggs are also prepared differently – the yolks are sieved to create a silkier texture, and the overall seasoning includes a touch of sweetness that balances the richness.
Can I make Japanese Tamago Sando ahead of time?
Yes, you can prepare the egg salad mixture up to 24 hours in advance and store it in the refrigerator. However, for the best texture, assemble the sandwiches no more than 2 hours before serving. The bread can become soggy if assembled too far in advance.
What’s the best bread to use for Japanese Tamago Sando?
Traditionally, soft milk bread (shokupan) is used in Japan. If you can’t find this, brioche buns or any soft, slightly sweet white bread works well. The key is using bread that’s soft enough to complement the creamy egg filling without being too crusty or dense.
Conclusion
Japanese Tamago Sando represents everything wonderful about Japanese cuisine – simple ingredients transformed through careful technique into something extraordinary. The silky egg salad, the soft bread, the perfect balance of flavors – it’s a sandwich that proves sometimes the simplest things are the most satisfying. Whether you’re making these for a quick lunch, a picnic, or just to treat yourself, this recipe brings a taste of Japan’s konbini culture right to your kitchen. For more delicious ideas, follow me on Pinterest