
Table of Contents
Looking for the perfect appetizer that combines the irresistible flavors of garlic, cheese, and buttery dough? These Cheesy Garlic Bites are about to become your new go-to party food! With a golden-brown exterior, gooey cheese center, and aromatic garlic butter coating, these bite-sized treats disappear faster than you can say “seconds please.” Whether you’re hosting game day, movie night, or just craving something indulgent, this recipe delivers restaurant-quality results with minimal effort.
Key Ingredients
The magic of these Cheesy Garlic Bites lies in their simple yet flavorful ingredients. Buttermilk biscuits provide the perfect foundation – their tender, slightly tangy flavor pairs beautifully with the rich fillings. Fresh mozzarella creates that signature cheese pull we all love, while the garlic butter sauce infuses every bite with savory goodness. The combination of mozzarella and parmesan cheeses creates a complex flavor profile that’s both sharp and creamy. A splash of white wine in the garlic butter adds depth and sophistication that elevates these bites from ordinary to extraordinary.

Ingredients List
| Ingredient | Quantity |
|---|---|
| Buttermilk biscuits (not flaky) | 2 cans |
| Mozzarella fresca ciliegine (cherry size) or mozzarella cubes | 20 balls |
| Olive oil | 3 tbsp |
| Garlic, minced | 6 cloves |
| Crushed red pepper flakes | Pinch |
| Butter | 2 tbsp |
| White wine | ¼ cup |
| Salt | ¼ tsp |
| Mozzarella cheese, shredded | 1 cup |
| Parmesan cheese, shredded | ½ cup |
| Salt and basil (to taste) | To taste |
Helpful Tools
To make perfect Cheesy Garlic Bites, you’ll need a few essential tools. A mini muffin pan is crucial for creating uniform, bite-sized portions that cook evenly. A good quality skillet is essential for making the garlic butter sauce – non-stick works well for easy cleanup.
You’ll also need a sharp knife for mincing garlic and cutting cheese if you’re not using pre-cut mozzarella balls. A pastry brush helps apply the garlic butter evenly, and having a cooling rack ready ensures your bites don’t get soggy bottoms. These simple tools make the process smooth and enjoyable.
Pro-Tips for Perfect Cheesy Garlic Bites
Success with this recipe comes down to a few key techniques. First, make sure your biscuits are at room temperature before working with them – cold dough is harder to shape and won’t cook as evenly. When wrapping the cheese, ensure the dough completely seals around the mozzarella ball to prevent leakage during baking.
For the garlic butter, don’t rush the sautéing process; low and slow heat brings out the garlic’s sweetness without burning it. If your wine causes excessive splattering when added, remove the pan from heat briefly before pouring.
Space the dough balls properly in your mini muffin pan to allow for even browning. For an extra flavor boost, try adding fresh herbs like rosemary or thyme to your garlic butter. And here’s a helpful tip: if you love pretzel-inspired appetizers, check out these Homemade Soft Pretzel Bites for another crowd-pleasing option!
How to Make Cheesy Garlic Bites
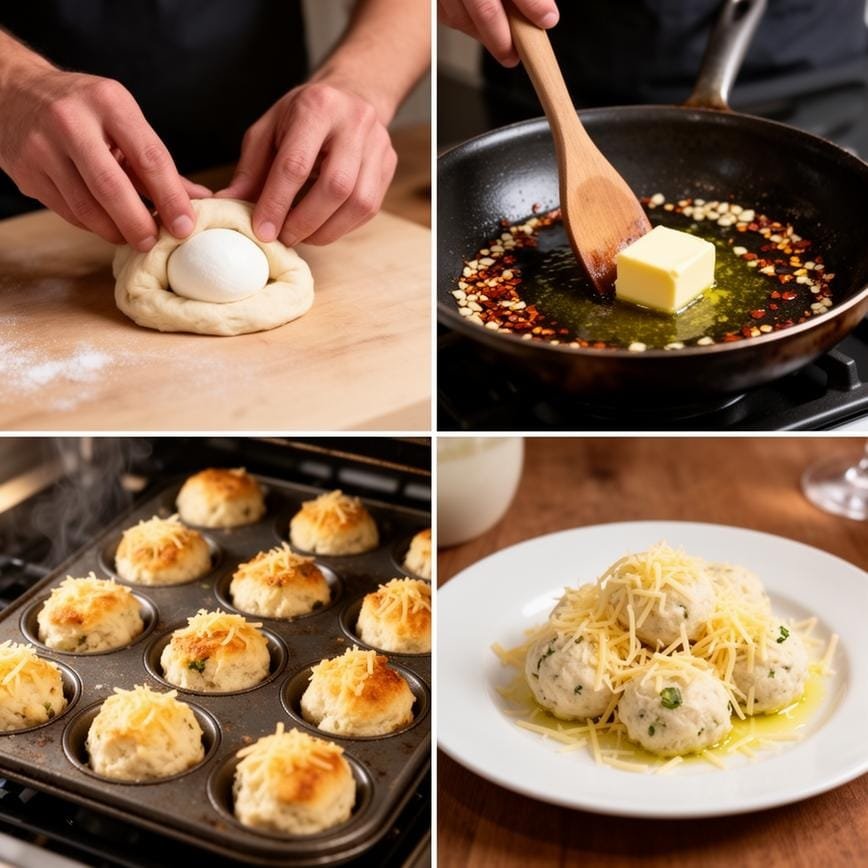
- Preheat your oven to 450°F (230°C). This high temperature ensures a crispy exterior while keeping the cheese gooey inside.
- Open the cans of buttermilk biscuits and separate each biscuit. Using your hands or a rolling pin, gently flatten each biscuit into a circle about 3-4 inches in diameter.
- Drain the liquid from your container of fresh mozzarella balls. If using a block of mozzarella, cut it into 20 equal cubes, about 1-inch each.
- Place one mozzarella ball or cube in the center of each flattened biscuit. Carefully wrap the dough around the cheese, pinching the edges together to completely seal it. Roll gently between your palms to form a smooth ball.
- Heat the olive oil in a skillet over medium-low heat. Add the minced garlic and crushed red pepper flakes, sautéing for 1-2 minutes until fragrant but not browned.
- Add the butter to the skillet and stir until completely melted. Slowly pour in the white wine and salt (the mixture may splatter), then continue cooking for another 1-2 minutes.
- Roll each dough ball in the garlic butter mixture, ensuring it’s well coated. Place the coated balls in a mini muffin pan with the sealed side facing up.
- Combine the shredded mozzarella and parmesan cheeses in a small bowl. Sprinkle a generous amount of the cheese mixture over each dough ball in the muffin pan.
- Bake in the preheated oven for 8-10 minutes, or until the bites are golden brown and the cheese on top is melted and bubbly.
- Remove from the oven and immediately brush the bites with any remaining garlic butter. Sprinkle with additional salt and fresh basil to taste.
- Serve warm and watch them disappear!
Delicious Variations to Try
Once you’ve mastered the basic Cheesy Garlic Bites recipe, try these creative variations. For a spicy kick, add diced jalapeños inside with the mozzarella or mix cayenne pepper into the garlic butter. Create a Mediterranean version by adding sun-dried tomatoes and a sprinkle of oregano to the cheese filling.
For meat lovers, wrap a small piece of pepperoni or salami around the mozzarella before enclosing it in dough. You can also experiment with different cheese combinations – try smoked gouda for a sophisticated twist or pepper jack for extra heat. For a breakfast version, add a small piece of cooked bacon inside and serve with a side of marinara sauce for dipping.
Cheesy Garlic Bites
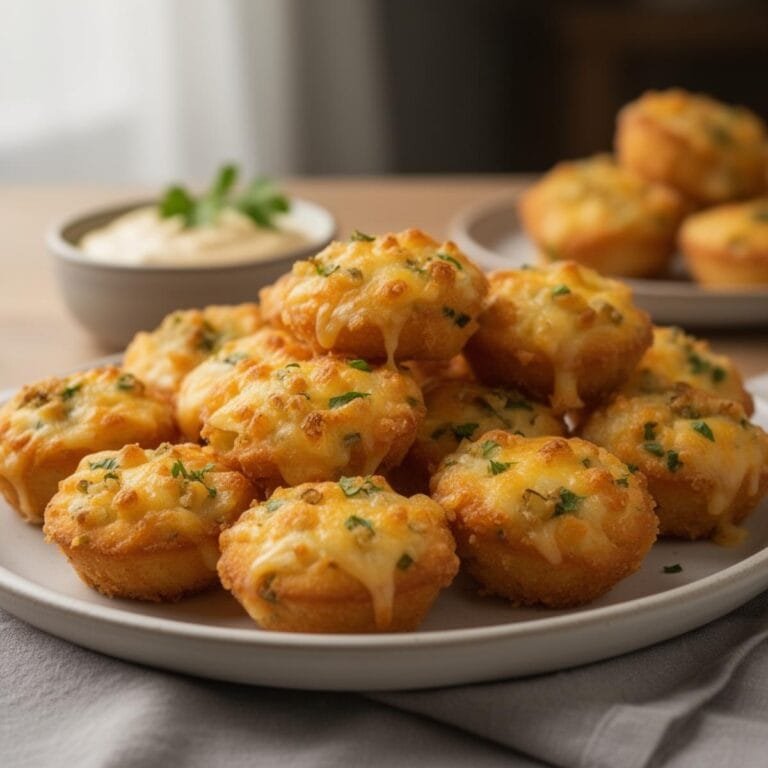
These Cheesy Garlic Bites are the ultimate appetizer: golden, buttery pillows of dough stuffed with a molten mozzarella center and drenched in a garlic-herb butter sauce. Made with a convenient shortcut (canned biscuit dough), they come together in minutes but taste like they came from a high-end Italian bakery. Perfect for game days, parties, or as a side to pasta.
- Total Time: 25
- Yield: 20 bites
Ingredients
— The Basics —
2 cans (16 oz each) refrigerated buttermilk biscuits (non-flaky homestyle works best)
20 fresh mozzarella balls (ciliegine/cherry size) or a block cut into 1-inch cubes
— The Garlic Butter Sauce —
3 tablespoons olive oil
2 tablespoons unsalted butter
6 cloves garlic, minced
1/4 cup dry white wine (or chicken broth)
1/4 teaspoon crushed red pepper flakes (optional)
1/4 teaspoon salt
— The Topping —
1 cup shredded mozzarella cheese
1/2 cup grated Parmesan cheese
1 tablespoon fresh basil or parsley, chopped (for garnish)
Instructions
1. **Preheat:** Preheat your oven to 450°F (230°C). Lightly grease a mini muffin tin (or a standard baking sheet) with non-stick spray.
2. **Prep Dough:** Open the cans of biscuits. Flatten each biscuit with your hand into a thin circle. (If the biscuits are large, you may need to cut them in half to match the number of cheese balls).
3. **Stuff:** Place one mozzarella ball (or cube) in the center of each flattened biscuit. Wrap the dough tightly around the cheese and pinch the seams firmly to seal. Roll it between your palms to form a smooth ball.
4. **Make Sauce:** In a skillet over medium heat, warm the olive oil. Add the minced garlic and red pepper flakes; sauté for 1 minute until fragrant. Add the butter and stir until melted. Pour in the white wine (or broth) and salt. Simmer for 1–2 minutes, then remove from heat.
5. **Coat:** Dip each dough ball into the garlic butter mixture, turning to coat it well. (Reserve any leftover sauce for serving).
6. **Assemble:** Place the coated balls into the mini muffin tin cups (seam-side down). If using a baking sheet, arrange them close together so they touch.
7. **Top:** Mix the shredded mozzarella and Parmesan cheese together. Sprinkle this cheese mixture generously over the tops of the dough balls.
8. **Bake:** Bake for 8–10 minutes, or until the tops are golden brown and the cheese is bubbly.
9. **Serve:** Brush with any remaining garlic butter sauce. Garnish with fresh chopped basil and serve warm.
Notes
Biscuit Choice: Use standard ‘homestyle’ or ‘buttermilk’ biscuits rather than the ‘flaky layers’ type. The flaky ones tend to separate during baking, which can cause the cheese to leak out.
Sealing is Key: Make sure you pinch the dough seams very tightly. If there is a hole, the mozzarella will melt out and leave you with a hollow bread bite.
Make Ahead: You can assemble the bites in the pan and refrigerate them for up to 4 hours before baking.
Wine Substitute: The white wine adds a great depth of flavor to the butter sauce, but you can substitute chicken broth or vegetable broth if you prefer an alcohol-free version.
- Prep Time: 15
- Cook Time: 10
- Category: Appetizer
- Method: Baking
- Cuisine: Italian-American
- Diet: Vegetarian
Frequently Asked Questions
Can I make Cheesy Garlic Bites ahead of time?
Yes! You can assemble the bites up to 24 hours in advance and store them covered in the refrigerator. When ready to serve, let them come to room temperature for about 30 minutes, then bake as directed. The garlic butter can also be made ahead and reheated gently before use.
What’s the best way to reheat leftover Cheesy Garlic Bites?
To maintain the crispy exterior, reheat in a 350°F oven for 5-7 minutes rather than using a microwave. If you’re in a hurry, a quick 20-30 seconds in the microwave will work, though the texture won’t be quite as good as freshly baked.
Can I freeze Cheesy Garlic Bites?
Absolutely! Freeze the assembled (but unbaked) bites on a baking sheet until solid, then transfer to a freezer bag. When ready to bake, place frozen bites directly in the mini muffin pan and add 2-3 minutes to the baking time. The garlic butter can also be frozen separately and thawed when needed.
Conclusion
These Cheesy Garlic Bites are more than just an appetizer – they’re a guaranteed crowd-pleaser that combines comfort food appeal with gourmet flavors. The contrast between the crispy, golden exterior and the molten cheese center creates a sensory experience that keeps people coming back for more.
Whether you’re serving them at a party, enjoying them as a game day snack, or treating yourself to something special, this recipe delivers consistent, delicious results every time. The best part? They’re surprisingly simple to make with ingredients you likely already have on hand.
So preheat that oven and get ready to make a batch of these irresistible bites – just be prepared for them to disappear in minutes! For more delicious ideas, follow me on Pinterest