
Table of Contents
There’s something magical about the aroma of freshly baked bread filling your home. This dutch oven garlic rosemary bread recipe combines the rustic charm of artisan bread with the aromatic flavors of garlic and rosemary.
The beauty of this recipe lies in its simplicity – no kneading required, just mix, rise, and bake. The dutch oven creates the perfect environment for developing that coveted crispy crust while maintaining a soft, chewy interior that will have everyone reaching for seconds.
Key Ingredients
The secret to this incredible bread lies in the quality of ingredients and their perfect balance. All-purpose flour provides the structure, while the combination of sugar and salt enhances the flavor profile. Quick yeast ensures a reliable rise, and warm water activates it perfectly.
The star ingredients – fresh rosemary and garlic – infuse the bread with their aromatic essence, creating a sensory experience that’s both comforting and sophisticated. Each component plays a crucial role in achieving that bakery-quality result.

Ingredients List
| Ingredient | Quantity |
|---|---|
| All Purpose Flour | 3 cups |
| Sugar | 1 1/2 tsp |
| Salt | 2 tsps |
| Quick Yeast | 2 1/2 tsp (1 package) |
| Water (warm) | 1 1/3 cups |
| Rosemary (fresh) | 2 large sprigs, taken off stems and diced |
| Garlic | 3 cloves, diced |
Helpful Tools
Success with this recipe depends on having the right tools at your disposal. A large mixing bowl is essential for combining ingredients, while a sturdy wooden spoon makes mixing the sticky dough much easier.
Parchment paper is crucial for transferring the dough without sticking, and a sharp knife or bread lame is needed for scoring the surface. Most importantly, a 5-6 quart dutch oven with a tight-fitting lid creates the perfect steamy environment for achieving that professional crust.
Pro-Tips
- Temperature matters! Make sure your water is warm (about 110°F) but not hot, as too much heat can kill the yeast. A kitchen thermometer can be helpful for precision.
- Don’t rush the rising process. The first rise is crucial for developing flavor and texture. If your kitchen is cool, create a warm spot by turning on your oven for a minute, then turning it off before placing the dough inside.
- Spaghetti Garlic Bread Bowls make an excellent pairing with this bread for a complete Italian-inspired meal.
- When shaping the dough, resist the urge to add extra flour. The sticky texture is what creates those beautiful air pockets in the final loaf.
- Scoring isn’t just decorative – it allows steam to escape and helps control how the bread expands during baking. Even a simple slash down the center works perfectly.
How to Make dutch oven garlic rosemary bread recipe
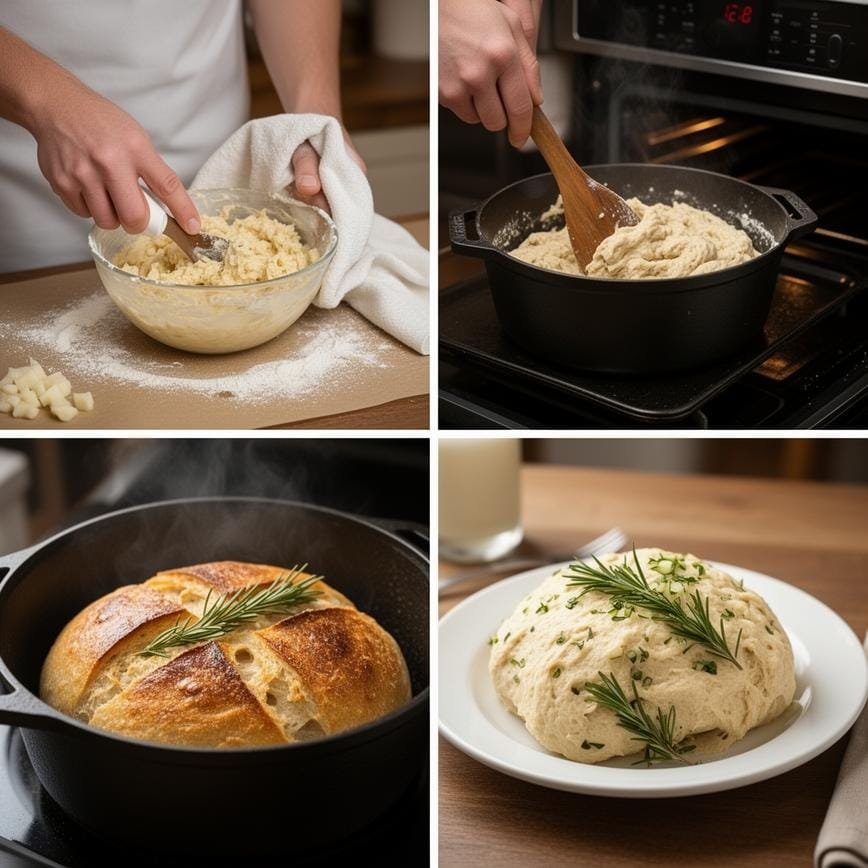
- First Rise: Combine all ingredients in a large mixing bowl. The dough will be sticky and shaggy – this is exactly what you want. Cover with a towel and let rise for 60 minutes in a warm place. The dough should approximately double in size.
- Shaping: Dust parchment paper with flour and transfer the risen dough onto it. Stretch each side gently and fold it over, working around until you form a rough ball shape. Flip it over so the smooth side faces up. Cover and let rise for another 20 minutes while preheating the dutch oven.
- Preheat Dutch Oven: Place your empty dutch oven (without the lid) in the oven. Preheat to 450°F and allow both the oven and pot to come to full temperature. This preheating step is crucial for achieving that crispy crust.
- Baking: Carefully remove the hot dutch oven using oven mitts. Lift the dough using the parchment paper and place it inside the pot. Score the top with a sharp knife, making a slash about 1/4 inch deep. Cover with the lid and bake for 30 minutes.
- Final Browning: Remove the lid and continue baking for another 10 minutes, or until the crust reaches a deep golden brown color. The initial pale color will transform into a beautiful, crispy exterior.
- Cooling: Using the parchment paper, lift the bread out of the dutch oven and transfer to a cooling rack. Allow to cool for at least 30 minutes before slicing – this waiting period is essential for the interior to set properly.
Variations
This versatile recipe can be adapted in countless ways to suit your taste preferences. Try adding grated Parmesan cheese and cracked black pepper for an Italian twist, or incorporate chopped olives and sun-dried tomatoes for a Mediterranean flavor profile.
For a sweeter version, omit the garlic and rosemary, then add cinnamon and raisins during the mixing stage. You could also experiment with different herbs like thyme, oregano, or sage to create unique flavor combinations that complement your meals.
Dutch Oven Garlic Rosemary Bread Recipe
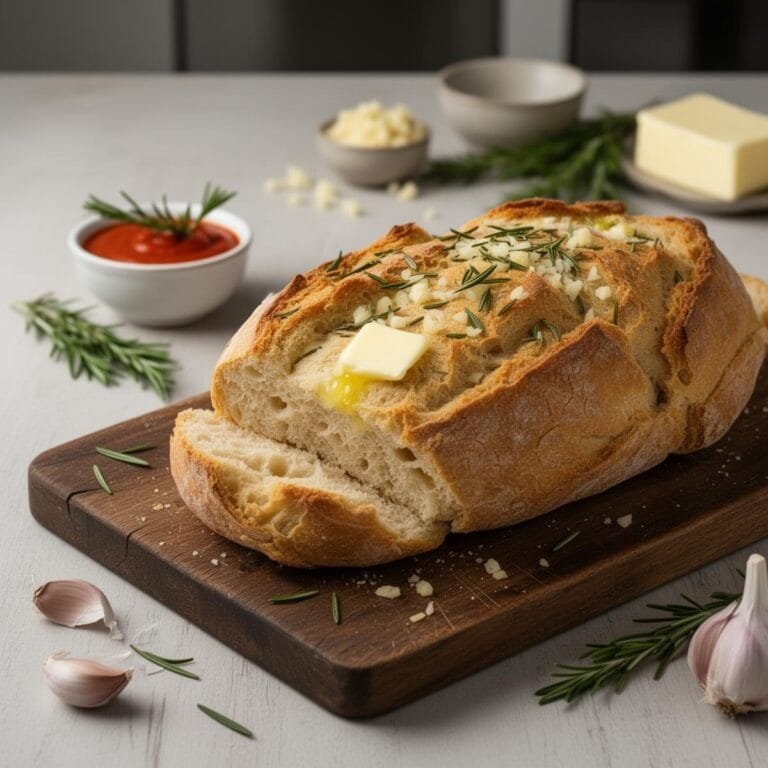
This Dutch Oven Garlic Rosemary Bread is the easiest artisan bread you will ever make. It requires no kneading and uses a Dutch oven to trap steam, creating a bakery-quality loaf with a golden, crackly crust and a soft, airy interior. Infused with fresh rosemary and chunks of garlic, it’s perfect for dipping in olive oil or serving alongside a hearty soup.
- Total Time: 120
- Yield: 1 loaf (10 slices)
Ingredients
— The Dry Ingredients —
3 cups all-purpose flour (plus more for dusting)
1 1/2 teaspoons sugar
2 teaspoons salt
2 1/2 teaspoons quick-rise (instant) yeast (1 standard packet)
2 large rosemary sprigs, leaves removed and minced
3 cloves garlic, minced or finely diced
— The Wet Ingredients —
1 1/3 cups warm water (approx. 100°F/38°C)
— For Baking —
Parchment paper
Cornmeal (optional, to prevent sticking)
Olive oil (optional, for serving)
Instructions
1. **Mix Dough:** In a large bowl, whisk together the flour, sugar, salt, yeast, minced rosemary, and garlic. Pour in the warm water and stir with a wooden spoon until a shaggy, sticky dough forms. You do not need to knead it—just make sure no dry flour remains.
2. **First Rise:** Cover the bowl with plastic wrap or a clean kitchen towel. Let it sit in a warm, draft-free spot for about 1 to 1.5 hours, or until the dough has doubled in size and looks bubbly.
3. **Preheat:** While the dough finishes rising, place your empty Dutch oven (with the lid on) inside your oven and preheat to 450°F (230°C). Let it heat up for at least 30 minutes.
4. **Shape:** Turn the sticky dough out onto a generously floured surface. Using floured hands, gently fold the dough over itself a few times to form a ball. (Do not overwork it).
5. **Transfer:** Place the dough ball onto a large square of parchment paper. Cover it with a towel and let it rest for 15–20 minutes while the oven finishes preheating.
6. **Score:** Just before baking, use a sharp knife or razor blade to slice a shallow ‘X’ or line across the top of the loaf. This helps the bread expand evenly.
7. **Bake Covered:** Carefully remove the hot Dutch oven from the oven. Lift the parchment paper with the dough and drop it directly into the pot. Cover with the hot lid and bake for 30 minutes.
8. **Bake Uncovered:** Remove the lid (the bread should be pale and puffed). Bake for another 10–15 minutes, uncovered, until the crust is deep golden brown and crispy.
9. **Cool:** Remove the bread from the pot and let it cool on a wire rack for at least 30 minutes before slicing.
Notes
**Water Temperature:** Ensure your water is warm to the touch but not hot. If it’s too hot (over 120°F), it will kill the yeast; if it’s too cold, the rise will take much longer.
**Sticky Dough:** The dough is supposed to be sticky! Don’t be tempted to add too much extra flour, or the bread will be dense.
**No Dutch Oven?** You can use any heavy, oven-safe pot with a tight-fitting lid. Alternatively, bake on a baking sheet with a pan of water on the bottom rack to create steam, though the crust won’t be quite as crispy.
**Flavor Variations:** Feel free to add grated Parmesan cheese or cracked black pepper to the dough for extra flavor.
- Prep Time: 10
- Cook Time: 40
- Category: Bread
- Method: Baking
- Cuisine: Artisan / European
FAQ
- Can I use active dry yeast instead of quick yeast?
- Yes, but you’ll need to activate it first. Dissolve the active dry yeast in the warm water with a pinch of sugar and let it sit for 5-10 minutes until foamy before adding to the other ingredients.
- Why did my bread turn out dense and heavy?
- This usually happens when the dough doesn’t rise properly. Ensure your yeast is fresh, the water temperature is correct (not too hot), and give the dough adequate time to rise in a warm environment.
Can I make this bread without a dutch oven?
While a dutch oven produces the best results, you can use a heavy oven-safe pot with a lid, or even a baking stone with a metal bowl placed over the dough to trap steam during the initial baking phase.
This dutch oven garlic rosemary bread recipe is more than just a baking project – it’s an experience that connects you to the timeless tradition of bread making. The combination of crispy crust, chewy interior, and aromatic flavors makes this bread worthy of any special occasion or simple family dinner.
Once you master this technique, you’ll find yourself making it again and again, perhaps even experimenting with your own flavor variations. The satisfaction of pulling a beautiful, golden loaf from your oven is truly unmatched.
For more delicious ideas, follow me on Pinterest