
Table of Contents
There’s something undeniably comforting about a classic grilled cheese sandwich—crispy, buttery bread hugging melted, gooey cheese. But what if you could enjoy that same deliciousness in a perfectly portioned, bite-sized form? Enter mini grilled cheese—the ultimate party appetizer, snack, or even a fun lunch idea for kids (and adults alike!).
These little sandwiches are made with Hawaiian sweet rolls, which add a subtle sweetness that pairs beautifully with sharp cheddar. Infused with garlic-herb butter, they’re crispy on the outside and irresistibly melty on the inside. Whether you’re hosting a game day gathering, packing a lunchbox, or just craving a quick cheesy fix, these mini grilled cheeses are about to become your new go-to.
Let’s dive into how to make them perfectly every time!
Key Ingredients for the Best Mini Grilled Cheese
The magic of these mini grilled cheeses lies in the Hawaiian sweet rolls—their soft, slightly sweet texture elevates the sandwich beyond the ordinary. Here’s why each ingredient matters:
– Hawaiian Sweet Rolls – These rolls are tender, slightly sweet, and hold up well to baking, making them ideal for mini sandwiches.
– Sharp Cheddar Cheese – The bold, tangy flavor cuts through the sweetness of the rolls, creating a perfect balance.
– Garlic-Herb Butter – A mix of butter, Italian seasoning, garlic powder, and fresh parsley adds a savory, aromatic kick that takes these sandwiches to the next level.

Ingredients List
Here’s everything you’ll need to make these mini grilled cheese sandwiches:
| Ingredient | Amount |
|---|---|
| Hawaiian sweet dinner rolls (12-count package) | 1 package |
| Sharp Cheddar cheese slices | 12 slices |
| Unsalted butter, softened | 8 tablespoons |
| Italian seasoning | 2 teaspoons |
| Garlic powder | 1 teaspoon |
| Fresh parsley, finely chopped | 1 tablespoon |
| Salt and pepper | To taste |
Helpful Tools for Making Mini Grilled Cheese
Having the right tools makes the process smoother and ensures perfect results every time. Here are three essentials:
1. Serrated Knife – For cleanly slicing the Hawaiian rolls without squishing them.
2. Pastry Brush – Helps spread the garlic-herb butter evenly on the rolls.
3. Baking Sheet with Parchment Paper – Prevents sticking and makes cleanup a breeze.
Pro-Tips for the Best Mini Grilled Cheese
Want to take your mini grilled cheeses from great to amazing? Follow these expert tips:
- 1. Use Room-Temperature Butter – Softened butter blends better with the seasonings and spreads more easily on the rolls.
- 2. Don’t Skip the Herb Butter – This flavor-packed mixture is what makes these sandwiches stand out. Be generous!
- 3. Press Gently After Flipping – A light press with a spatula helps the cheese melt evenly and ensures crispiness.
- 4. Experiment with Cheese Blends – Try mixing cheddar with pepper jack or Gruyère for extra depth of flavor.
- 5. Serve with a Side of Soup – These mini sandwiches pair perfectly with tomato soup. For another delicious Hawaiian-inspired dish, check out this Hawaiian Crockpot Chicken A Sweet Savory Slow Cooked Delight for a full meal idea!
How to Make Mini Grilled Cheese
Ready to get cooking? Follow these simple steps for crispy, cheesy perfection:
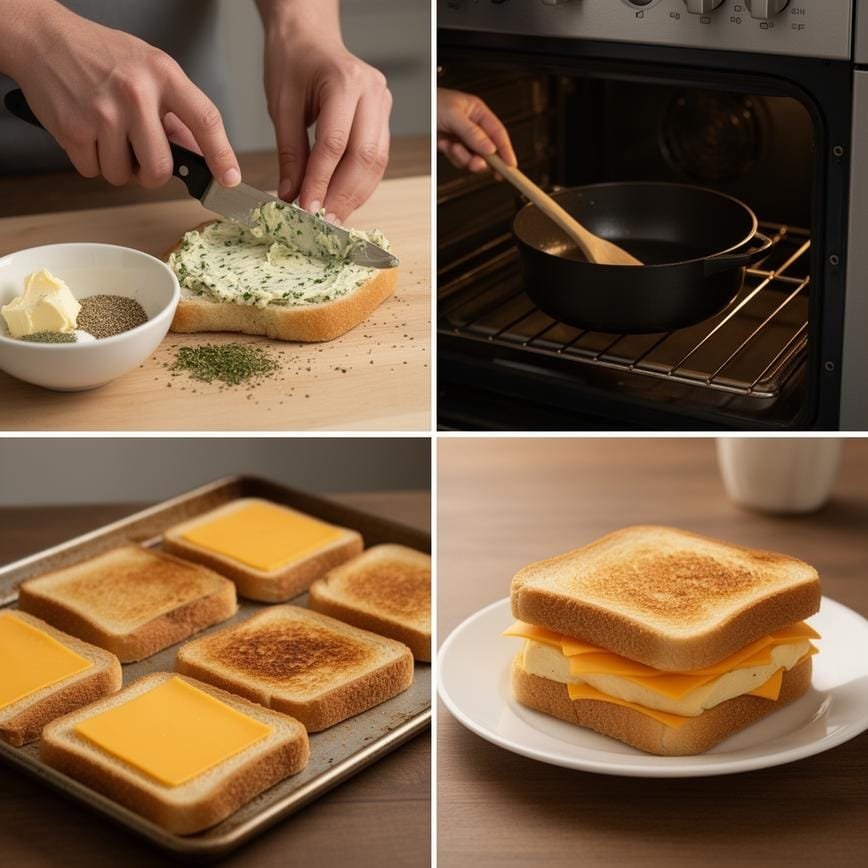
- 1. Preheat the Oven – Set your oven to 350°F (175°C) and line a baking sheet with parchment paper.
- 2. Slice the Rolls – Separate the Hawaiian rolls and slice each one horizontally into thirds (you’ll have a top, middle, and bottom piece).
- 3. Make the Garlic-Herb Butter – In a small bowl, mix the softened butter, Italian seasoning, garlic powder, parsley, salt, and pepper until well combined.
- 4. Butter the Rolls – Spread the garlic-herb butter evenly on both cut sides of each roll piece. Use all the butter for maximum flavor!
- 5. Cut the Cheese – Trim the cheddar slices into smaller squares to fit the size of the rolls.
- 6. Assemble the Sandwiches – Place the bottom roll piece on the baking sheet, add two cheese squares, then top with the middle roll piece. Add another cheese square and finish with the top roll piece.
- 7. First Bake – Bake for 5-7 minutes until the cheese starts to melt.
- 8. Flip and Press – Carefully flip each sandwich and gently press down with a spatula to help them crisp up.
- 9. Second Bake – Return to the oven for another 5-7 minutes, or until golden and crispy.
- 10. Serve Warm – Enjoy immediately, ideally with tomato soup for dipping!
Delicious Variations to Try
Once you’ve mastered the classic version, get creative with these fun twists:
1. Bacon & Jalapeño – Add crispy bacon and a slice of jalapeño for a spicy, smoky kick.
2. Ham & Swiss – Swap cheddar for Swiss cheese and add a slice of ham for a mini Monte Cristo vibe.
3. Pesto & Mozzarella – Spread pesto on the rolls and use mozzarella for an Italian-inspired version.
Mini Grilled Cheese
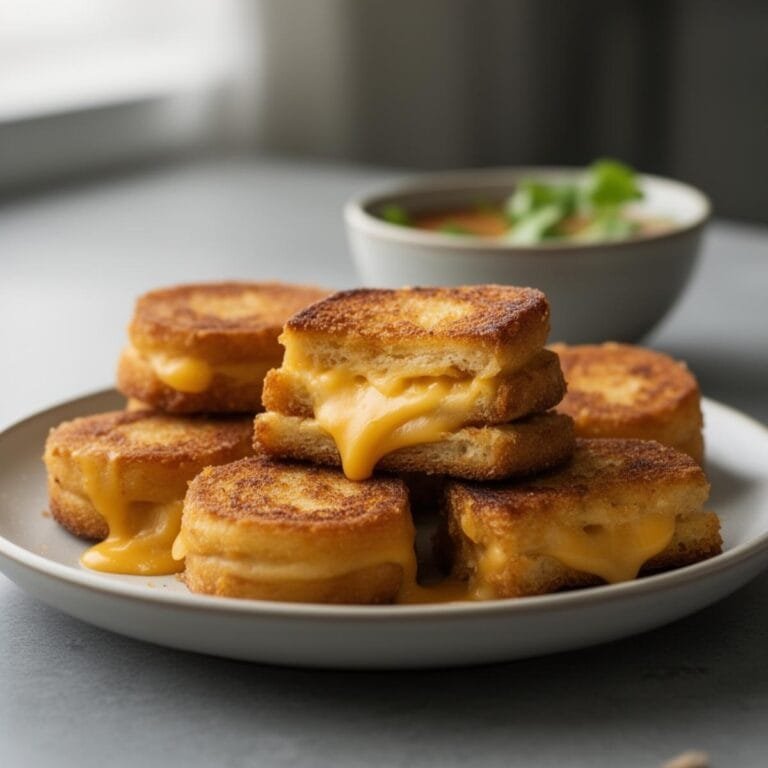
These Mini Grilled Cheese Sandwiches are the perfect bite-sized comfort food! Crispy on the outside and gooey on the inside, they are a fun twist on the classic sandwich. Ideal for kids’ parties, appetizers, or just a fun lunch, especially when served with a warm cup of tomato soup for dipping.
- Total Time: 15
- Yield: 16 mini sandwiches
Ingredients
8 slices sandwich bread (white, whole wheat, or sourdough)
4-6 slices American cheese (or sharp cheddar, provolone)
3 tablespoons unsalted butter, softened
Tomato soup (optional, for serving)
Instructions
1. **Prep the Bread:** If desired, cut the crusts off the bread slices for a neater square shape (and to make them extra kid-friendly).
2. **Assemble:** Place cheese slices between two pieces of bread to form sandwiches. You want the cheese to stay inside the bread, so tear the cheese slices to fit if necessary.
3. **Butter:** Spread a thin, even layer of softened butter on the outside of each sandwich (top and bottom bread slices).
4. **Grill:** Heat a large non-stick skillet or griddle over medium heat. Place the sandwiches in the pan and cook for 2-3 minutes per side, or until the bread is golden brown and the cheese is fully melted.
5. **Cut into Minis:** Remove the sandwiches from the pan to a cutting board. Let them cool for about 1 minute (to keep the cheese from oozing out too much). Using a sharp knife, cut each sandwich into 4 small squares or triangles.
6. **Serve:** Arrange the mini grilled cheeses on a platter and serve immediately while warm. Pair with small cups of tomato soup for the ultimate dipping experience.
Notes
Cheese Choices: American cheese melts the best, but a mix of cheddar and gruyere makes for a more gourmet ‘grown-up’ version.
Add-ins: For an appetizer version, try adding a small slice of bacon, a basil leaf, or a pickle slice inside before grilling.
Party Serving: These are best served fresh, but you can keep them warm in a 200°F oven on a wire rack if making a large batch.
- Prep Time: 5
- Cook Time: 10
- Category: Appetizer / Lunch
- Method: Stovetop
- Cuisine: American
- Diet: Vegetarian
FAQ About Mini Grilled Cheese
Got questions? We’ve got answers!
1. Can I make these ahead of time?
Yes! Assemble the sandwiches (without baking) and refrigerate for up to 2 hours before baking. You can also freeze them (unbaked) for up to a month—just bake straight from frozen, adding a few extra minutes.
2. What’s the best cheese for mini grilled cheese?
While sharp cheddar is our top pick for its bold flavor, other great options include pepper jack, Gruyère, or even brie for a gourmet touch.
3. How do I keep them crispy after baking?
If serving later, place the baked sandwiches on a wire rack (not a plate) to prevent steam from making them soggy. Reheat in the oven at 300°F for 5 minutes to restore crispiness.
Final Thoughts: Why You’ll Love These Mini Grilled Cheeses
These mini grilled cheese sandwiches are more than just a cute appetizer—they’re a flavor-packed, crowd-pleasing treat that’s easy to customize and even easier to devour. Whether you’re making them for a party, a quick snack, or a fun lunch, their buttery, cheesy, crispy goodness will have everyone coming back for seconds.
For more delicious ideas, follow me on Pinterest.