
Table of Contents
Craving a warm, cheesy, and protein-packed lunch that’s ready in minutes? Look no further than this Tuna Melt Wrap! Combining the classic flavors of a tuna melt with the convenience of a wrap, this recipe is perfect for busy weekdays or a satisfying weekend bite. With crispy tortillas, gooey cheddar, and a zesty tuna filling, every bite is a flavor explosion.
Whether you’re meal prepping or whipping up a last-minute lunch, this Tuna Melt Wrap is a game-changer. Plus, it’s customizable—swap in your favorite veggies or cheeses to make it your own!
Key Ingredients
The magic of this Tuna Melt Wrap lies in its simple yet flavorful ingredients:
– Tuna in brine or spring water – Provides a light, protein-rich base.
– Mayonnaise – Binds the filling and adds creaminess.
– Gherkins & sundried tomatoes – Bring a tangy, briny kick.
– Wheat tortilla wraps – Hold everything together while getting crispy when grilled.
– Spinach & bell pepper – Add freshness and crunch.
– Cheddar cheese – Melts beautifully for that irresistible gooey texture.

Ingredients List
Here’s everything you’ll need to make two Tuna Melt Wraps:
| Ingredient | Quantity |
|---|---|
| Tuna (in brine or spring water, drained) | 1 tin (145g) |
| Mayonnaise | 2 tablespoons |
| Gherkins (finely chopped) | 1-2 |
| Sundried tomatoes in oil (drained, finely chopped) | 4 |
| Wheat tortilla wraps (large, 10in) | 2 |
| Spinach | Handful |
| Bell pepper (thinly sliced) | ¼ |
| Cheddar cheese (coarsely grated) | 70g |
Helpful Tools
To make the perfect Tuna Melt Wrap, these tools will come in handy:
1. Griddle pan or non-stick frying pan – For achieving that crispy, golden exterior.
2. Heavy skillet or pan – To weigh down the wraps while cooking.
3. Mixing bowl & spoon – For combining the tuna filling.
Pro-Tips for the Best Tuna Melt Wrap
- 1. Drain the tuna well – Excess moisture can make the wrap soggy.
- 2. Use room-temperature cheese – It melts faster and more evenly.
- 3. Don’t overfill – Keep the filling compact to prevent spillage.
- 4. Press firmly while cooking – A weighted pan ensures a crispy, even cook.
- 5. For extra creaminess, try mixing in avocado instead of mayo—like in The Best Creamy Avocado Tuna Egg Salad No Mayo
How to Make Tuna Melt Wrap
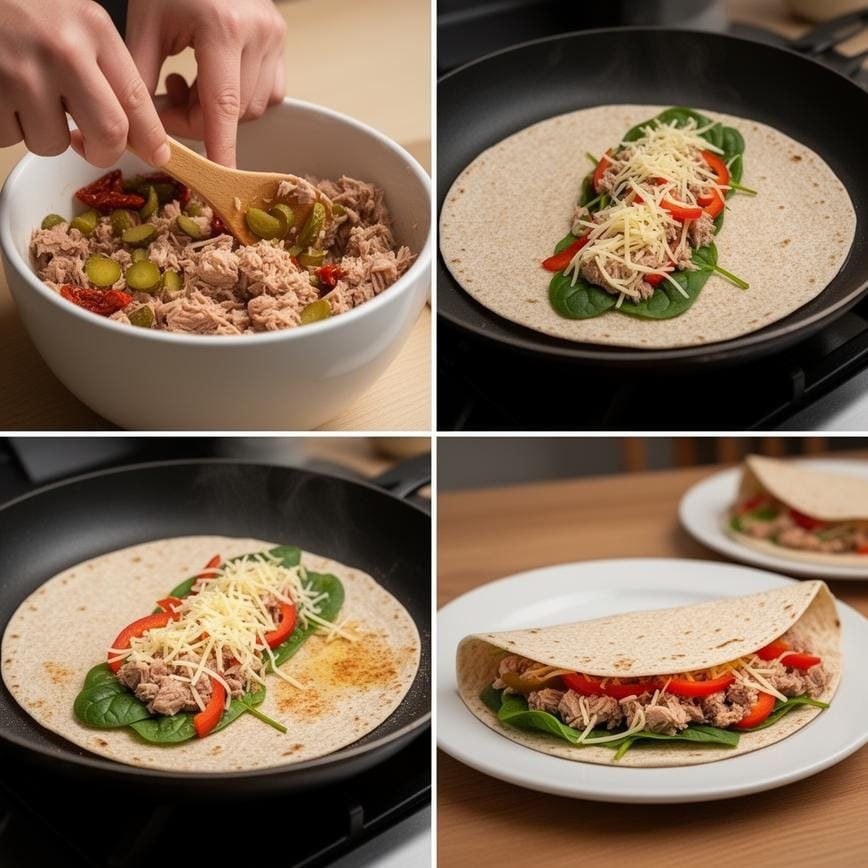
Follow these simple steps for a Tuna Melt Wrap that’s crispy, cheesy, and delicious:
- 1. Mix the filling – In a bowl, combine drained tuna, chopped gherkins, sundried tomatoes, and mayonnaise. Season with salt and pepper.
- 2. Assemble the wrap – Lay a tortilla flat and place a handful of spinach in a vertical line down the center.
- 3. Add the filling – Spoon half of the tuna mixture over the spinach, then top with bell pepper slices and grated cheddar.
- 4. Fold the wrap – Fold the top and bottom edges over the filling, then fold the sides in to create a tight wrap.
- 5. Cook the wrap – Heat a griddle pan (or non-stick pan) with a little oil over medium-high heat. Place the wrap seam-side down and press with a heavy pan.
- 6. Crisp both sides – Cook for 2-3 minutes until golden, then flip and cook for another 2-3 minutes.
- 7. Serve warm – Slice in half and enjoy with a side salad!
Variations to Try
Switch up your Tuna Melt Wrap with these tasty twists:
1. Spicy Kick – Add a dash of hot sauce or chopped jalapeños.
2. Mediterranean Style – Swap cheddar for feta and add olives.
3. Extra Crunch – Include shredded lettuce or coleslaw mix.
Tuna Melt Wrap
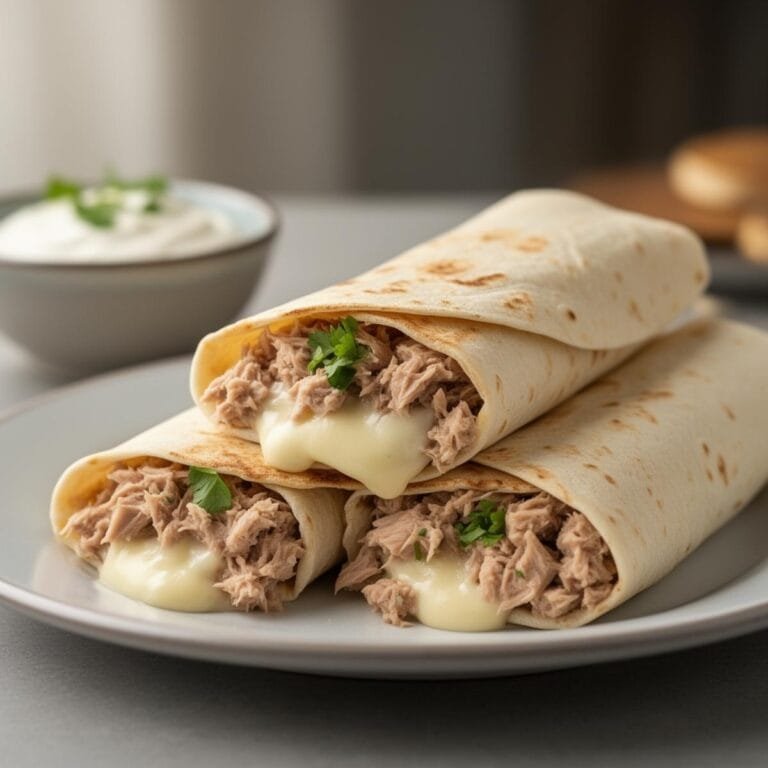
This Tuna Melt Wrap is a fantastic twist on the classic diner sandwich. A zesty, crunchy tuna salad is paired with gooey cheddar cheese and wrapped in a flour tortilla, then pan-seared until the exterior is golden and crispy. It makes for a quick, high-protein lunch that is comforting and portable.
- Total Time: 20
- Yield: 2 wraps
Ingredients
— The Tuna Salad —
2 cans (5 oz each) tuna in water, drained well
3 tablespoons mayonnaise (or Greek yogurt for a lighter option)
1 stalk celery, finely diced
2 tablespoons red onion, finely diced
1 tablespoon sweet pickle relish or chopped pickles
1 teaspoon Dijon mustard
1 teaspoon fresh lemon juice
Salt and black pepper to taste
— The Wraps —
2 large flour tortillas (burrito size)
1 cup shredded Cheddar or Swiss cheese
1 tablespoon butter (for frying)
Optional: Sliced tomato or avocado
Instructions
1. **Make the Tuna Salad:** In a medium bowl, combine the drained tuna, mayonnaise, diced celery, red onion, relish, Dijon mustard, lemon juice, salt, and pepper. Use a fork to mix well and break up any large chunks of tuna.
2. **Assemble:** Lay the tortillas flat. Sprinkle ¼ cup of cheese in the center of each tortilla.
3. Top with the tuna salad mixture (and tomato/avocado if using).
4. Sprinkle the remaining cheese on top of the tuna. (Placing cheese on both the top and bottom acts as ‘glue’ to hold the wrap together).
5. **Fold:** Fold in the sides of the tortilla, then roll it up tightly from the bottom like a burrito.
6. **Cook:** Melt the butter in a skillet over medium heat. Place the wraps in the skillet, **seam-side down** first (this seals them shut).
7. Cook for 3–4 minutes per side, pressing down gently with a spatula, until the tortilla is golden brown and crispy and the cheese inside is fully melted.
8. **Serve:** Remove from the pan, slice in half diagonally, and serve hot.
Notes
Avoid Sogginess: Make sure to drain the tuna *very* thoroughly. Excess water is the enemy of a crispy wrap. If adding tomatoes, remove the watery seeds first.
The Cheese Glue: Always put a layer of cheese directly on the tortilla before adding the tuna. As it melts, it fuses the filling to the wrap so it doesn’t fall out when you eat it.
Air Fryer Method: You can air fry these wraps at 375°F (190°C) for 6–8 minutes until crispy, flipping halfway through.
Storage: The tuna salad can be made 2 days in advance. Assemble and cook the wraps right before eating for the best texture.
- Prep Time: 10
- Cook Time: 10
- Category: Lunch
- Method: Stovetop
- Cuisine: American
FAQ
Q: Can I make this ahead of time?
A: Yes! Assemble the wraps and refrigerate (uncooked) for up to 24 hours. Cook just before serving.
Q: What’s the best cheese for melting?
A: Cheddar, Monterey Jack, or pepper jack all work beautifully.
Q: Can I use a different type of tortilla?
A: Absolutely! Try spinach wraps or whole-grain tortillas for extra flavor.
Conclusion
This Tuna Melt Wrap is the ultimate quick, cheesy, and satisfying meal—perfect for lunch, dinner, or even a snack. With minimal prep and maximum flavor, it’s a recipe you’ll come back to again and again.
For more delicious ideas, follow me on Pinterest.