
Table of Contents
If you’re looking for a dish that’s both satisfying and kind to your waistline, these Zucchini Rolls are your new best friend. Imagine tender zucchini sheets wrapped around a creamy cheese filling, smothered in a rich tomato sauce, and baked to golden perfection. It’s comfort food without the guilt, and it’s so easy to make. Whether you’re following a low-carb lifestyle, just trying to eat more veggies, or simply want a delicious, wholesome meal, this recipe delivers. Plus, it’s a fantastic way to get your family to eat their vegetables without any complaints.
Key Ingredients
The beauty of this recipe lies in its simplicity. The star of the show is, of course, the zucchini. We use three medium zucchinis, sliced thin and roasted to remove excess moisture. This ensures our rolls stay firm and don’t get soggy. The filling is a classic Italian combination of ricotta, Parmesan, and a touch of mozzarella, all bound together with a single egg and seasoned with Italian herbs. The sauce is a simple, no-sugar-added tomato sauce, enhanced with a splash of balsamic vinegar for a subtle depth of flavor. It’s a harmonious blend of fresh, wholesome ingredients that come together to create something truly special.

Ingredients List
| Ingredient | Amount | Notes |
|---|---|---|
| Zucchini | 3 medium (~1 1/2 lb) | Sliced into 1/4-inch sheets |
| Olive oil | 2 tbsp | For brushing zucchini |
| Sea salt | 1/4 tsp | For seasoning zucchini |
| Black pepper | 1/8 tsp | For seasoning zucchini |
| Whole milk ricotta cheese | 6 oz | The base of the filling |
| Grated Parmesan cheese | 1/4 cup | For the filling |
| Egg | 1 large | Bind the filling |
| Italian seasoning | 1/2 tsp | For the filling |
| Mozzarella cheese (shredded) | 1 cup | For the filling and topping |
| Tomato sauce (no sugar added) | 10 oz | The base of the sauce |
| Balsamic vinegar | 1/2 tbsp | For the sauce |
| Garlic (finely minced) | 1 clove | For the sauce |
Helpful Tools
To make this recipe as easy and efficient as possible, you’ll need a few key tools. First and foremost, a mandoline slicer is essential for getting those perfectly thin, even zucchini slices. It’s a game-changer that ensures all your rolls will be the same size and cook evenly. A large baking sheet with parchment paper is necessary for roasting the zucchini slices. An 8×8 square glass casserole dish is the perfect size for assembling and baking the rolls. And, of course, a good chef’s knife and cutting board are indispensable for prepping the garlic and any other ingredients.
Pro-Tips
- 1. Choose the right zucchini: Look for medium-sized zucchinis that are firm and have smooth skin. Avoid any that are too large, as they can be watery and have larger seeds.
- 2. Don’t skip the roasting step: Roasting the zucchini slices is crucial for removing excess moisture. This prevents your rolls from becoming soggy and ensures they hold their shape.
- 3. Pat them dry: After roasting, make sure to pat the zucchini slices dry with paper towels. This extra step helps to further reduce moisture.
- 4. Use a mandoline: A mandoline slicer will give you perfectly even slices, which is essential for uniform cooking and a professional look.
- 5. Try a different filling: If you’re looking for a different flavor profile, consider using our Korean Rolled Omelette Best Protein Breakfast as inspiration for a protein-packed variation.
How to Make Zucchini Rolls
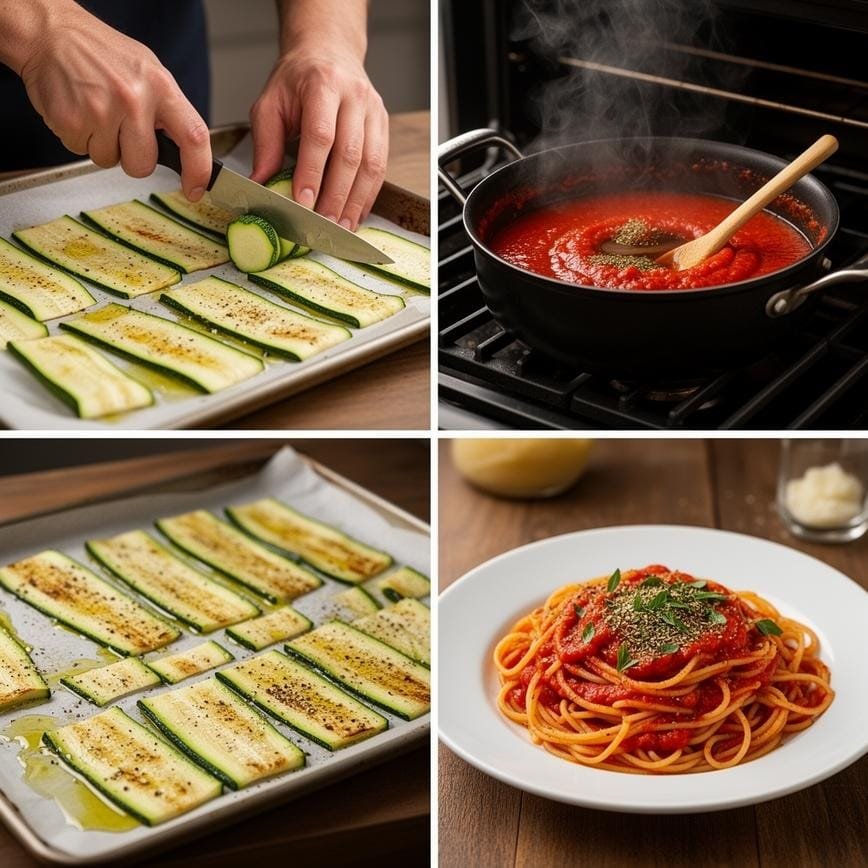
- 1. Preheat your oven to 400 degrees F (204 degrees C) and line a large baking sheet with parchment paper.
- 2. Cut the ends off the zucchinis and use a mandoline to slice them lengthwise into 1/4-inch thick sheets.
- 3. Arrange the zucchini slices in a single layer on the prepared baking sheet, brush both sides with olive oil, and season with salt and pepper.
- 4. Roast the zucchini slices for 15-20 minutes, until they are soft and most of the moisture has evaporated.
- 5. While the zucchini is roasting, prepare the sauce by mixing the tomato sauce, olive oil, balsamic vinegar, Italian seasoning, and minced garlic in a small bowl. Adjust salt to taste if needed.
- 6. Spread 3/4 cup of the sauce at the bottom of an 8×8 square glass casserole dish and set the remaining sauce aside.
- 7. In a medium bowl, combine the ricotta, Parmesan, egg, and Italian seasoning to create the filling.
- 8. Once the zucchini slices are done, arrange them on a cutting board and pat them dry with paper towels.
- 9. Spread a tablespoon of the ricotta mixture over each zucchini slice, sprinkle with a tablespoon of mozzarella, and roll them up tightly.
- 10. Place the rolls seam-side down in the prepared baking dish.
- 11. Top each roll with 1/2 tablespoon of the remaining sauce and 1/2 tablespoon of mozzarella.
- 12. Bake for about 10 minutes, until the cheese on top is melted and bubbly.
- 13. Garnish with fresh basil and serve immediately.
Variations
The beauty of this recipe is its versatility. You can easily customize it to suit your taste preferences or dietary needs. For a meatier version, try adding cooked and crumbled Italian sausage to the ricotta mixture. If you’re a fan of spinach, wilted and chopped spinach pairs beautifully with the cheese filling. For a vegan twist, use dairy-free ricotta and mozzarella alternatives, and you’ll still get that creamy, satisfying texture. The possibilities are endless, and each variation brings its own unique flavor profile to the table.
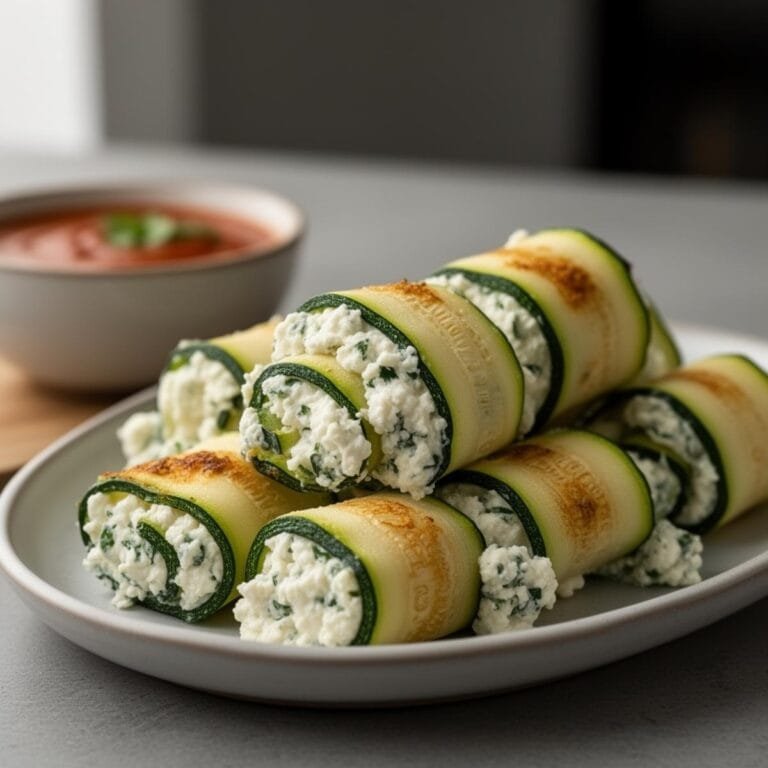
Zucchini Rolls
These Grilled Zucchini Rolls are the perfect low-carb appetizer or healthy snack. Thin slices of zucchini are lightly grilled until tender and smoky, then rolled up with a creamy, savory filling of herbed cream cheese, garlic, and bright lemon zest. They are elegant, keto-friendly, and ready in minutes.
- Total Time: 30
- Yield: 12 rolls
Ingredients
— The Zucchini —
2 large zucchini (choose straight ones for easier slicing)
1 tablespoon olive oil
Salt and freshly ground black pepper
— The Herbed Cheese Filling —
8 oz (225g) cream cheese or goat cheese, softened to room temperature
1 tablespoon fresh lemon juice
1 teaspoon lemon zest
1 clove garlic, minced
2 tablespoons fresh basil, finely chopped
1 tablespoon fresh dill or parsley, chopped
Optional: A handful of baby spinach or arugula leaves (to roll inside)
Optional: Toasted pine nuts or walnuts for crunch
Instructions
1. **Prep the Zucchini:** Wash the zucchini and trim off the ends. Using a mandoline slicer or a very sharp knife, slice the zucchini lengthwise into strips about 1/4-inch thick. (Discard the outermost slices that are mostly skin).
2. **Season:** Lay the slices out on a baking sheet or tray. Brush both sides lightly with olive oil and sprinkle with salt and pepper.
3. **Grill:** Preheat a grill or a grill pan over medium-high heat. Place the zucchini strips on the grill. Cook for 2–3 minutes per side, or until the zucchini is tender, pliable, and has nice grill marks. (Do not overcook to mush!).
4. **Cool:** Remove the zucchini from the grill and place them on a paper towel-lined plate to cool completely. Gently blot away any excess moisture or oil.
5. **Make the Filling:** While the zucchini cools, combine the softened cream cheese (or goat cheese), lemon juice, lemon zest, minced garlic, chopped basil, and dill in a small bowl. Mix until smooth and creamy.
6. **Assemble:** Lay a cooled zucchini strip flat on your work surface.
7. Spread about 1 tablespoon of the cheese mixture evenly over the strip.
8. *(Optional: Place a few leaves of baby spinach or arugula on top of the cheese).*
9. Starting from one end, roll the zucchini up tightly.
10. **Serve:** Place the rolls seam-side down on a platter. Serve immediately, or refrigerate for up to 2 hours before serving to let them firm up.
Notes
Slicing: A mandoline is highly recommended to get even slices. If the slices are too thick, they will snap when you try to roll them. If they are too thin, they might burn on the grill.
Moisture Control: Zucchini contains a lot of water. Blotting them with paper towels after grilling is crucial to prevent a watery filling.
Cheese Variations: You can swap the cream cheese for ricotta (drain it well first!) or a Boursin garlic & herb cheese spread.
Storage: These are best eaten the day they are made, but they can be stored in an airtight container in the fridge for up to 24 hours.
- Prep Time: 20
- Cook Time: 10
- Category: Appetizer
- Method: Grill
- Cuisine: Mediterranean
- Diet: Gluten Free
FAQ
Can I make these ahead of time?
Absolutely! You can assemble the rolls a day in advance and store them in the refrigerator. Just add a few extra minutes to the baking time if you’re cooking them straight from the fridge.
Can I freeze Zucchini Rolls?
Yes, you can freeze them either before or after baking. If freezing before baking, wrap the assembled dish tightly in plastic wrap and foil. If freezing after baking, let them cool completely before wrapping. Reheat in the oven for best results.
What can I serve with Zucchini Rolls?
These rolls are quite filling on their own, but they pair wonderfully with a simple green salad or a side of roasted vegetables. A slice of crusty bread is also a great addition if you’re not strictly low-carb.
Zucchini Rolls are more than just a recipe; they’re a testament to how simple, wholesome ingredients can come together to create something truly delicious and satisfying. They’re perfect for a weeknight dinner, a special occasion, or even as a make-ahead meal for busy days. With their low-carb profile and high protein content, they’re a smart choice for anyone looking to eat well without sacrificing flavor. So, go ahead, give this recipe a try, and discover just how delicious healthy eating can be.
For more delicious ideas, follow me on Pinterest