
Table of Contents
There’s something magical about the combination of rich chocolate and creamy peanut butter. While store-bought peanut butter cups are a classic treat, making them at home takes the experience to a whole new level. These homemade peanut butter cups are fresher, creamier, and infinitely customizable. Plus, they’re surprisingly easy to make with just a few simple ingredients. Whether you’re whipping up a batch for a party, a gift, or just a sweet indulgence, this recipe will quickly become a favorite.
Key Ingredients
The beauty of this recipe lies in its simplicity. The star ingredients—peanut butter and chocolate—create a perfect harmony of flavors and textures. Here’s why each component matters:
– Creamy Peanut Butter: The heart of the filling, providing that signature nutty, creamy taste. Using a high-quality peanut butter (without added sugars or oils) ensures the best flavor.
– Confectioners’ Sugar: Adds sweetness and helps bind the peanut butter filling, giving it a smooth, pipeable consistency.
– Butter: Enhances the richness of the filling, making it even more decadent.
– Semisweet Chocolate Chips & Milk Chocolate Bars: A blend of both chocolates creates a balanced sweetness and depth of flavor. The semisweet chips add a slight bitterness, while the milk chocolate brings creaminess.
– Salt: A pinch of salt elevates the flavors, cutting through the sweetness and making every bite more satisfying.

Ingredients List
Here’s everything you’ll need to make these homemade peanut butter cups:
| Ingredient | Amount |
|---|---|
| Creamy peanut butter, divided | 1 cup |
| Confectioners’ sugar | 1/2 cup |
| Butter, softened | 4-1/2 teaspoons |
| Salt | 1/2 teaspoon |
| Semisweet chocolate chips | 2 cups |
| Milk chocolate candy bars (1.55 oz each), coarsely chopped | 4 |
| Colored sprinkles (optional) | As desired |
Helpful Tools
Having the right tools makes the process smoother and more enjoyable. Here are three essentials:
1. Mini Muffin Tin & Paper Liners: These create the perfect size and shape for your peanut butter cups. The liners make removal easy and keep things tidy.
2. Microwave-Safe Bowls: For melting the chocolate and peanut butter mixture evenly without burning.
3. Small Cookie Scoop or Spoon: Helps portion the filling and chocolate layers neatly into the cups.
Pro-Tips for Perfect Peanut Butter Cups
- 1. Use Room Temperature Ingredients: Ensure your peanut butter and butter are softened for a smooth, lump-free filling.
- 2. Melt Chocolate Gently: Heat the chocolate in 20-30 second intervals, stirring in between, to prevent seizing or burning.
- 3. Layer Evenly: For the best texture, make sure each layer is thin and uniform. This ensures a perfect ratio of chocolate to peanut butter in every bite.
- 4. Chill Between Layers: If the peanut butter filling is too soft, pop the tray in the fridge for 5-10 minutes before adding the final chocolate layer.
- 5. Get Creative with Add-Ins: For a fun twist, mix in crushed nuts, sea salt, or even a drizzle of caramel. If you love no-bake treats, check out this recipe for Easy 5 Ingredient Chocolate Peanut Butter Bites No Bake—it’s another crowd-pleaser!
How to Make Homemade Peanut Butter Cups
Ready to dive in? Follow these simple steps for foolproof peanut butter cups:
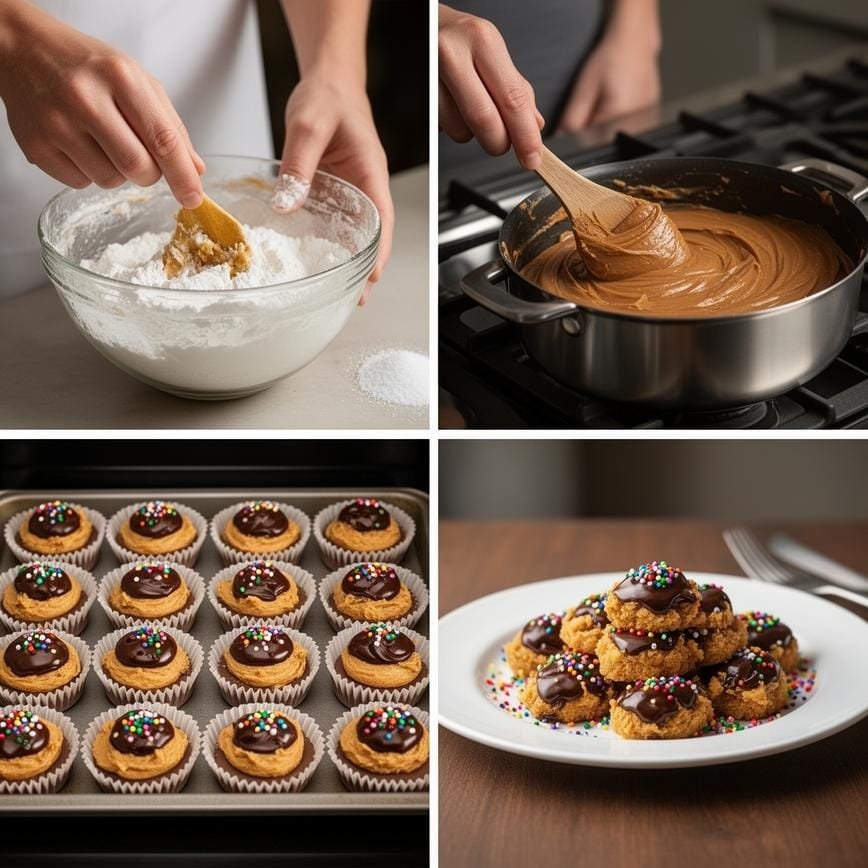
- 1. Prepare the Filling: In a medium bowl, combine 1/2 cup peanut butter, confectioners’ sugar, butter, and salt. Mix until smooth and well combined. Set aside.
- 2. Melt the Chocolate: In a microwave-safe bowl, combine the semisweet chocolate chips, chopped milk chocolate bars, and the remaining 1/2 cup peanut butter. Microwave in 20-30 second intervals, stirring between each, until fully melted and smooth.
- 3. Layer the Chocolate: Place paper liners in a mini muffin tin. Spoon about 1 teaspoon of the melted chocolate mixture into each liner, ensuring the bottom is fully covered. Tap the tin gently to even out the chocolate.
- 4. Add the Peanut Butter Filling: Drop a scant teaspoon of the peanut butter filling into the center of each chocolate-filled liner. Be careful not to overfill—leave room for the top chocolate layer.
- 5. Seal with Chocolate: Spoon another teaspoon of melted chocolate over the peanut butter filling, ensuring it’s fully covered. If the chocolate has thickened, reheat it briefly.
- 6. Decorate (Optional): While the chocolate is still wet, sprinkle with colored sprinkles or a pinch of sea salt for extra flair.
- 7. Chill & Set: Refrigerate the peanut butter cups for at least 30 minutes, or until the chocolate is firm.
- 8. Store: Keep in an airtight container in the fridge for up to a week, or freeze for longer storage.
Delicious Variations
Once you’ve mastered the classic recipe, try these fun variations:
1. Dark Chocolate & Almond Butter Cups: Swap the milk chocolate for dark chocolate and use almond butter instead of peanut butter for a sophisticated twist.
2. White Chocolate & Raspberry: Use white chocolate chips and add a dollop of raspberry jam to the peanut butter filling for a fruity, tangy contrast.
3. Crunchy Peanut Butter Cups: Mix chopped peanuts or pretzel bits into the peanut butter filling for added texture.
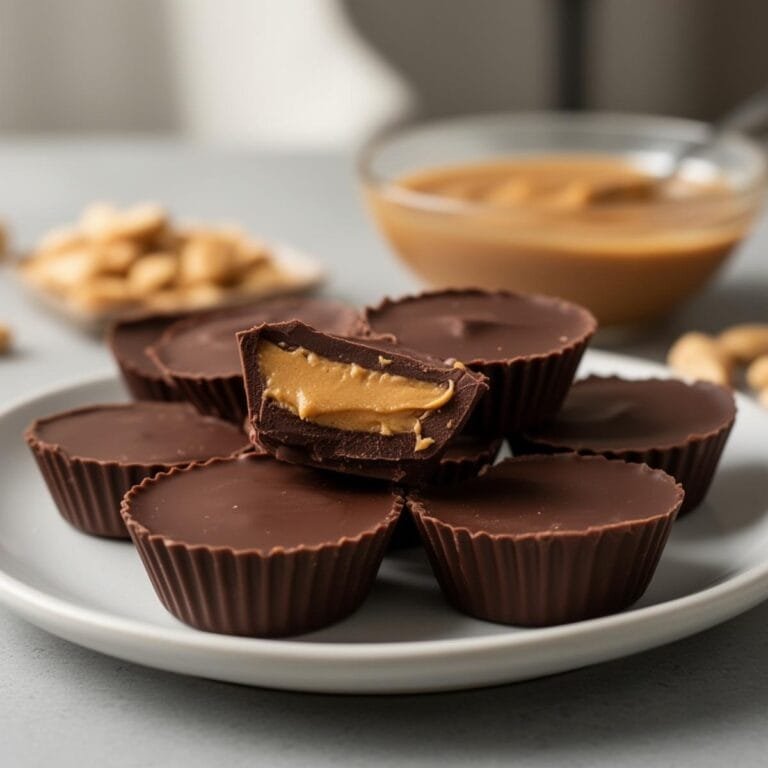
Homemade Peanut Butter Cups
Forget the candy aisle—these Homemade Peanut Butter Cups are surprisingly easy to make and taste infinitely better than the packaged version. With a creamy, slightly gritty peanut butter filling (thanks to a secret ingredient!) encased in a smooth chocolate shell, these no-bake treats are the perfect balance of salty and sweet.
- Total Time: 50
- Yield: 12 cups
Ingredients
— The Chocolate Shell —
2 cups (340g) semi-sweet or milk chocolate chips (high quality is best)
2 tablespoons coconut oil (or vegetable shortening) to make the chocolate shiny and snappy
— The Peanut Butter Filling —
1 cup (250g) creamy peanut butter (commercial brands like Jif or Skippy work best)
½ cup (1 stick / 113g) unsalted butter, softened
¾ cup (85g) graham cracker crumbs (the secret to the authentic texture!)
1 cup (120g) powdered sugar
¼ teaspoon salt (adjust to taste)
Instructions
1. **Prepare the Pan:** Line a standard 12-cup muffin tin (or a 24-cup mini muffin tin) with paper cupcake liners.
2. **Make the Filling:** In a medium bowl using a hand mixer, beat the peanut butter and softened butter until creamy. Add the graham cracker crumbs, powdered sugar, and salt. Beat until combined and smooth. The mixture should be thick and moldable.
3. **Melt Chocolate:** In a microwave-safe bowl, combine the chocolate chips and coconut oil. Microwave in 30-second intervals, stirring in between, until completely smooth and glossy.
4. **Bottom Layer:** Spoon about 1-2 teaspoons of melted chocolate into the bottom of each muffin liner. Tilt the pan slightly to coat the bottom evenly. Place the tin in the freezer for 10 minutes to set.
5. **Add Filling:** Remove tin from freezer. Scoop about 1 tablespoon of the peanut butter mixture and roll it into a ball, then flatten it into a disc with your palms. Place the disc gently on top of the frozen chocolate layer. Repeat for all cups.
6. **Top Layer:** Spoon the remaining melted chocolate over the peanut butter discs, smoothing it out to the edges to seal the peanut butter inside.
7. **Chill:** Place the tin back in the fridge for 20–30 minutes, or until the chocolate is completely set firm.
8. **Serve:** Remove the paper liners and enjoy! Store leftovers in the refrigerator to keep the chocolate crisp.
Notes
The Secret Texture: The graham cracker crumbs are essential! They give the filling that signature ‘Reese’s’ texture that isn’t just smooth peanut butter.
Chocolate Choice: Semi-sweet chocolate balances the sweet filling best, but milk chocolate mimics the classic candy bar taste.
Storage: These will keep in an airtight container in the refrigerator for up to 2 weeks, or in the freezer for up to 3 months.
Nut-Free Option: You can substitute the peanut butter with sunflower seed butter or cookie butter for a different twist.
- Prep Time: 20
- Category: Dessert / Candy
- Method: No-Bake / Chill
- Cuisine: American
- Diet: Vegetarian
FAQ
Got questions? Here are answers to some common queries:
1. Can I use natural peanut butter?
Yes, but be aware that natural peanut butter (without stabilizers) can be runnier. If using it, chill the filling for 10-15 minutes before assembling to make it easier to handle.
2. How do I prevent the chocolate from seizing?
Avoid any contact with water, as even a drop can cause chocolate to seize. Ensure your bowls and utensils are completely dry. If the chocolate does seize, stir in a teaspoon of coconut oil or vegetable shortening to smooth it out.
3. Can I make these vegan?
Absolutely! Use vegan chocolate chips and butter substitutes, and ensure your peanut butter is free from dairy. Coconut oil can also replace butter in the filling.
Conclusion
There’s nothing quite like biting into a homemade peanut butter cup—the creamy filling, the rich chocolate shell, and the satisfaction of knowing you made it yourself. This recipe is a game-changer for anyone who loves the classic candy but wants a fresher, more customizable version. Whether you stick to the original or experiment with variations, these treats are sure to impress.
For more delicious ideas, follow me on Pinterest.